Last Updated: August 2026 • Based on NREL Solar Permitting Best Practices, SolarAPP+ Data, the 2023 NEC (Articles 690 and 705), and State-Level AHJ Research
One of the most common surprises for homeowners going solar is the time between signing a contract and actually having panels on the roof. In most cases, that gap is not caused by the installation itself, which typically takes one to three days. It is caused by permits. Solar permits are a required step in every residential and commercial solar installation in the United States, and depending on where you live, they can take anywhere from a few days to several months to receive.
This guide explains what solar permits are, why they are required, exactly what is included in a permit package, what plan checkers actually verify under NEC Articles 690 and 705, how structural attachment schedules are calculated, how long permits take in different states, what the final inspection covers, and what you or your installer can do to speed up the process. If you are still sizing your project, start with our solar system size calculator and our overview of solar panel system components before your installer draws the permit plans.
⚡ Quick Answer
Solar permits are official approvals required before installing a solar system on a residential or commercial building. Most residential solar installations require at least two permits: a building permit and an electrical permit. Timeline varies widely by jurisdiction. In streamlined markets, permits are issued in 1 to 5 business days. In slow-processing municipalities, it can take 4 to 12 weeks. The national average permit timeline is approximately 2 to 4 weeks.
Key Takeaways
- Permits Are Required Everywhere: Every US state requires permits for grid-connected solar installations. Installing without a permit is illegal and can result in fines, forced removal, and voided homeowner insurance.
- Two Types of Permits: A building permit covers the structural aspects (roof loading, mounting). An electrical permit covers the wiring, inverter, disconnect, and utility interconnection.
- Timeline Varies Enormously: From 1 day in cities using SolarAPP+ to 12 weeks in slow municipal building departments. Where you live is the single biggest factor.
- Plan Check Follows NEC 690 and 705: Plan checkers verify rapid shutdown, the 120% busbar rule, wire sizing at 125% of continuous current, grounding, and labeling before any permit is issued.
- Your Installer Handles It: A licensed solar installer is responsible for pulling permits, submitting drawings, scheduling inspections, and obtaining final approval. You should not need to do this yourself.
- Utility Interconnection is Separate: After local permits are approved and the system passes inspection, a separate utility interconnection application must be approved before you can turn the system on.
- SolarAPP+ Is Accelerating Timelines: The NREL-developed SolarAPP+ platform allows participating municipalities to issue solar permits in under 24 hours using automated code compliance checking.
- Permit Costs: Building and electrical permit fees range from $100 to $500 for most residential systems, though some jurisdictions charge more based on system value.
In This Guide
- What Are Solar Permits?
- Why Are Solar Permits Required?
- Types of Permits Needed for Solar
- What Is Included in a Solar Permit Application?
- NEC 690 and 705: What Plan Checkers Verify
- Structural Attachment Schedules and Roof Loading Math
- How Long Do Solar Permits Take by State?
- The Full Solar Permit and Interconnection Process
- The Final Inspection Checklist
- SolarAPP+ and the Push for Faster Permits
- How to Speed Up the Permit Process
- How Much Do Solar Permits Cost?
- What Happens If You Install Without a Permit?
- Frequently Asked Questions
A solar permit is an official authorization issued by your local government, typically the city or county building department, that approves the installation of a solar energy system on your property. Before any solar panels can be mounted on a roof or on the ground, before any wires are run, and before the system can be connected to the electrical grid, the relevant permit must be applied for, reviewed, and approved.
Permits exist to ensure that solar installations meet building codes, electrical safety standards, and structural requirements. They protect you as a homeowner, protect your neighbors, and ensure that the utility grid remains safe when your system feeds electricity back into it. Think of a permit as a third-party verification that your installer is doing the job correctly and safely.
Who Issues Solar Permits?
- Building Department: Issues the building permit for structural components like roof mounting, racking, and panel attachment. Reviews plans against local building codes and IBC (International Building Code) standards.
- Electrical Department (or combined with building): Issues the electrical permit covering wiring, inverter installation, disconnect switches, breaker sizing, and grounding. Reviews against NEC (National Electrical Code) requirements.
- Fire Department (some jurisdictions): Reviews solar installations for compliance with fire safety setback requirements, particularly for emergency responder roof access.
- HOA or Historic District Board (if applicable): Some homeowners associations and historic districts have separate approval processes for solar installations on visible roof faces.
Installer Field Note — From the PES Supply Counter
I tell every contractor who buys panels from us the same thing: the permit is not paperwork, it is the project. I have watched a two-day roof mount sit finished and dark for six weeks because nobody checked whether the AHJ wanted a wet-stamped structural letter. Learn your local building department's checklist before you order a single rail, and your schedule will survive contact with reality.
Solar installations involve significant structural modifications to a building and complex electrical work that connects directly to the utility grid. Permits exist for three primary reasons.
| Reason | What It Protects | Real-World Risk Without It |
|---|---|---|
| Structural Safety | Ensures the roof can carry the added weight of panels and mounting hardware without damage or collapse | Roof damage, structural failure, costly repairs after the fact |
| Electrical Safety | Verifies that wiring, inverters, disconnects, and breakers meet NEC code and are installed safely | Fire hazard, shock risk, equipment damage, voided homeowner insurance |
| Grid Safety and Anti-Islanding | Confirms that the system will disconnect from the grid during outages to protect utility workers | Electrocution risk for utility line workers responding to outages |
Beyond safety, permits also protect your financial investment. A permitted and inspected solar system is documented as a legal, compliant improvement to your property. This matters when you sell your home, file an insurance claim involving the system, or apply for financing against your property.
Most residential solar installations require at least two permits. Commercial and utility-scale projects may require additional approvals depending on project size and location. If you are scoping a larger project, our breakdown of commercial solar installation costs covers how permitting scales with system size.
| Permit Type | What It Covers | Issued By | Required For |
|---|---|---|---|
| Building Permit | Structural integrity of roof, mounting system, panel loads, wind uplift, and snow load ratings | Local building department | All roof-mount and ground-mount solar systems |
| Electrical Permit | Inverter installation, DC and AC wiring, conduit runs, disconnects, breakers, grounding, and panel upgrades | Local electrical department (or combined with building) | All grid-connected solar systems |
| Utility Interconnection Agreement | Authorization from the utility to connect the system to the grid and enable net metering | Your electric utility company | All grid-tied systems (not required for off-grid) |
| HOA Approval | Review of panel placement, aesthetics, and compliance with community rules | Homeowners Association (if applicable) | Homes in HOA communities (note: most states prohibit HOAs from blocking solar) |
| Fire Department Sign-Off | Confirms setbacks for emergency responder roof access pathways per IFC Section 605 | Local fire marshal or fire department | Required in California and some other jurisdictions; varies by AHJ |
A solar permit application is a package of technical documents that your installer prepares and submits to the building department. The specific requirements vary by jurisdiction, but most require the following documents.
Standard Solar Permit Application Package
- Site Plan: A scaled drawing showing the property, roof layout, panel placement, and setbacks from roof edges, ridges, and hips for fire access pathways.
- Structural Drawings: Plans showing how the racking attaches to the roof, attachment point spacing, lag bolt sizing and embedment depth, and structural calculations for snow and wind loads.
- Electrical Single-Line Diagram (SLD): A simplified circuit diagram showing how panels connect to the inverter, disconnect, breaker, and utility meter. Required by all electrical departments.
- Equipment Specifications: Manufacturer spec sheets for the panels, inverter, and racking system. Must show UL listing numbers.
- Load Calculations: Documentation showing the service panel has adequate capacity for the solar backfeed breaker, or that a panel upgrade is included in the scope.
- Installer License: Copy of the licensed contractor's state electrical or solar contractor license.
- Property Information: Assessor parcel number, address, and owner information.
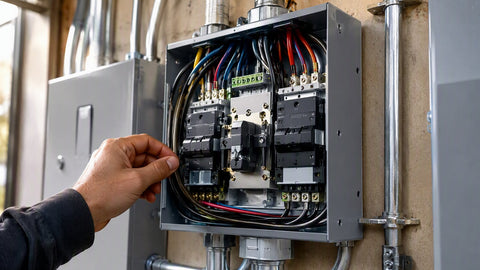
Plan check is the desk review where your permit either sails through or bounces back for corrections. Reviewers work from a code checklist built on NEC Article 690 (Solar Photovoltaic Systems) and Article 705 (Interconnected Electric Power Production Sources). Knowing what they look for is the difference between a first-pass approval and three rounds of revisions. The table below lists the checkpoints that appear on nearly every residential plan review, and our NEC 690 disconnect and overcurrent protection guide goes deeper on the hardware side.
| NEC Section | Requirement | What the Plan Must Show |
|---|---|---|
| 690.12 Rapid Shutdown | Controlled conductors outside the array boundary must fall to 30 V or less within 30 seconds of initiation; inside the boundary, no more than 80 V within 30 seconds | Module-level shutdown device (MLPE) listing, initiator location, and the required rapid-shutdown label at the service equipment |
| 690.8 Circuit Sizing | PV circuit conductors and overcurrent devices sized at 125% of maximum continuous current | Example: a 32 A inverter output requires 32 A × 1.25 = 40 A breaker and wire rated for 40 A after derating |
| 705.12(B) Load-Side Connection (120% Rule) | Busbar rating × 1.20 must be ≥ main breaker + PV backfeed breaker | Busbar rating, main breaker size, backfeed breaker size and position at opposite end of the bus |
| 705.11 Supply-Side Connection | Tap conductors sized for the sum of all sources; overcurrent protection within 10 ft or 25 ft tap rules | Tap location, conductor ampacity, and fused or breaker disconnect ahead of the service panel |
| 690.43 / 250 Grounding and Bonding | Equipment grounding conductor sized per NEC 250.122; module and racking bonding with listed hardware | EGC size, bonding method (lay-in lugs or listed racking), and grounding electrode connection point. See our grounding and bonding guide |
| 690.13 / 690.15 Disconnects | Readily accessible PV disconnecting means; DC disconnect or isolator where required by AHJ | AC disconnect within sight of the meter (where the utility requires it), DC isolator at the inverter |
| 690.56 / 705.10 Labels and Placards | Permanent directory placard at the service showing all power sources; DC conduit labels every 10 ft | Label schedule on the SLD: "WARNING: DUAL POWER SOURCE," rapid shutdown placard, and conduit markings |
| 690.7 / 690.9 Voltage and OCPD | String voltage corrected for record-low temperature must stay below 600 V (residential) and inverter input max | Cold-temperature voltage calculation using the module Voc temperature coefficient and local design temperature |
The 120% rule, worked out: take a typical 200 A service panel with a 200 A busbar and a 200 A main breaker. NEC 705.12 allows the sum of breakers feeding the bus to reach 200 A × 1.20 = 240 A. Subtract the 200 A main and the largest permissible solar backfeed breaker is 40 A. A 40 A breaker carries 40 A × 0.80 = 32 A of continuous inverter output, or 32 A × 240 V = 7,680 W (7.7 kW AC). If the design calls for an 11.5 kW inverter, the installer has two code-compliant paths: derate the main breaker to 175 A, which raises the solar allowance to 240 A − 175 A = 65 A (use a 60 A breaker, 60 × 0.8 × 240 V = 11,520 W), or make a supply-side tap under 705.11 sized to the service rating. If the panel is already maxed out, a service upgrade goes on the permit scope, and wire sizing follows our NEC ampacity chart guide.
Installer Field Note — The Single Biggest Plan-Check Killer
In my experience, the number one reason a permit package comes back is an incomplete single-line diagram. I had a job in a Louisville suburb bounce twice because the SLD showed the backfeed breaker but not the busbar rating. The plan checker cannot verify the 120% rule without it, so they reject the whole packet. Now I stamp the bus rating, main size, backfeed size, and breaker position on every SLD before it leaves my desk, and our first-pass approval rate went from about 70% to over 95%.
The building permit reviewer checks two structural questions: can the roof carry the added dead load, and will the attachments resist wind uplift. The dead-load math is straightforward. A modern 450 W residential module weighs about 50 lb (23 kg). A 20-panel array totals roughly 1,000 lb spread across approximately 360 sq ft of roof, an added dead load of about 2.8 psf including racking. Residential roofs are typically designed for 20 psf live load plus dead load, so the panels use a small fraction of capacity. The real engineering is uplift, and that is where the attachment schedule on your plans comes from. Our solar panel racking systems guide covers rail and clamp selection, and ballasted flat-roof designs are covered in our solar ballast blocks overview.
| Wind Zone (Ultimate Speed) | Max Attachment Spacing | Lag Bolt Spec (Into Rafter) | Typical Allowable Withdrawal per Attachment |
|---|---|---|---|
| ≤ 115 mph (interior) | 48 in on center | 5/16 in × 3.5 in lag, 2.5 in min embedment | ~500 lb (Douglas fir / southern pine, 2.5 in embedment × ~200 lb per inch) |
| 116–140 mph (most coastal) | 36 in on center | 5/16 in × 4 in lag, 3 in embedment | ~600 lb at 3 in embedment |
| 141–160 mph (hurricane-prone FL/Gulf) | 24 in on center | 3/8 in × 4 in lag or structural screw, 3 in embedment | ~750 lb; many AHJs require sealed engineering letter |
| > 160 mph (HVHZ, Miami-Dade/Broward) | Per product approval (NOA) | Listed fastener per Miami-Dade NOA only | Tested values from the Notice of Acceptance, not generic tables |
Uplift check, worked out: take that same 360 sq ft array in a 120 mph zone with a design uplift pressure of 25 psf on the roof edge zone. Total uplift is 360 × 25 = 9,000 lb. With attachments at 36 in spacing on rails spanning two rafters, the array has about 40 attachment points, so each attachment sees 9,000 ÷ 40 = 225 lb of uplift against an allowable withdrawal of roughly 600 lb — a safety factor above 2.5, and the plan checker signs off. Change the spacing to 48 in and the per-attachment load climbs to about 300 lb; still passing, but with less margin. That is why high-wind jurisdictions demand tighter spacing, and why snow-belt reviewers in Colorado mountain towns ask for 50 to 70 psf snow-load calculations instead. Attachments must land in rafter centers, not just sheathing — a 5/16 in lag into 7/16 in OSB alone has almost no rated withdrawal value, and inspectors do check for missed rafters with a tug test.
Permit timelines vary more by local municipality than by state, but states set the regulatory frameworks that shape how fast or slow local processes tend to be. Here are representative timelines based on NREL data and industry experience.
| State | Typical Permit Timeline | Why It Is Fast or Slow | Notable Programs |
|---|---|---|---|
| California | 3 to 21 days | AB 2188 requires streamlined permits. Many cities use SolarAPP+. Bay Area and LA have 3 to 5 day timelines. Rural areas slower. | SolarAPP+, AB 2188 permit reform |
| Arizona | 1 to 10 days | High solar adoption, experienced permitting staff, streamlined processes in Phoenix and Tucson metro areas | SolarAPP+ in Phoenix metro |
| Texas | 5 to 30 days | Highly variable. Some municipalities require minimal review. Others have slow manual processes. No state-level streamlining mandate. | No statewide reform in place |
| Florida | 5 to 21 days | SB 1794 requires 15-day permit processing. Coastal jurisdictions may require wind uplift engineering review which adds time. | SB 1794 15-day mandate |
| New York | 14 to 60 days | FY2027 budget includes 30-day deemed approval for systems under 25 kW. Older municipalities still slow. NYC has complex process. | FY2027 30-day deemed approval reform |
| Massachusetts | 7 to 45 days | Older housing stock requires more structural review. Some towns have slow manual review processes. Boston and suburbs vary widely. | No statewide streamlining mandate yet |
| Colorado | 5 to 20 days | Denver and Front Range cities have streamlined processes. Mountain jurisdictions slower due to snow load engineering requirements. | Denver SolarAPP+ participant |
| New Jersey | 7 to 30 days | State streamlining laws exist but enforcement varies. Dense suburban municipalities with high demand can run behind. | State residential solar streamlining law |
⚠ Utility Interconnection Can Take Longer Than the Permit
Even after your local building and electrical permits are approved and your system passes inspection, you still need utility permission to turn the system on. Utility interconnection approval can take 2 to 8 weeks in many markets, and sometimes longer for systems larger than 10 kW or in areas with congested distribution feeders. Your total timeline from contract to energization typically ranges from 6 to 16 weeks.
Here is the complete sequence of steps from contract signing to the day your solar system turns on and starts generating electricity.
Step 1. Site Assessment and System Design (1 to 2 weeks)
Installer measures roof, checks structural condition, designs system layout, and prepares permit drawings.
Step 2. HOA Approval (if required) (1 to 4 weeks)
Submit panel layout to HOA board for review. Most states require HOA approval within 45 to 60 days and prohibit outright denial.
Step 3. Building and Electrical Permit Submission (1 to 45 days depending on jurisdiction)
Installer submits permit package to local building department. Review and approval timeline is the most variable step in the process.
Step 4. Installation (1 to 3 days)
Once permits are in hand, the physical installation typically takes 1 to 3 days for a standard residential system.
Step 5. Building and Electrical Inspection (1 to 10 days after installation)
A city or county inspector visits the site to verify the installation matches the approved drawings and meets all code requirements.
Step 6. Utility Interconnection Application (2 to 8 weeks)
Installer submits the completed inspection certificate to the utility. Utility reviews and issues Permission to Operate (PTO).
Step 7. Permission to Operate Issued (PTO)
The utility issues written Permission to Operate. Your installer activates the system. Net metering starts immediately.
Installer Field Note — Run the Clocks in Parallel
The biggest scheduling mistake I see from newer installers is running every step in sequence. I submit the utility interconnection application the same week the building permit goes in, and I book the inspection before the crew loads the truck. On a recent 8 kW job, that parallel approach took us from signed contract to PTO in 7 weeks flat while a competitor's identical project down the street took 14. Nothing about the equipment was different — the paperwork just never sat still.
The final inspection is a 20-to-60-minute site visit where a city or county inspector verifies the installed system matches the approved plans and meets code. Failed inspections add 1 to 3 weeks to the timeline because the correction must be made, documented, and re-inspected. These are the items inspectors verify most often, based on common AHJ checklists. Wiring workmanship details are covered in our solar panel wiring basics guide.
| Inspection Area | What the Inspector Checks | Common Failure |
|---|---|---|
| Roof attachments | Lag bolts hit rafter centers, spacing matches approved plan, flashing installed at every penetration | Missed rafters, skipped flashing, attachments spaced wider than plan |
| Array layout | Panel placement and fire setbacks match the approved site plan (typically 3 ft pathways at ridges and edges) | Panels shifted during install, encroaching on fire access pathways |
| Rapid shutdown | Initiator device present, system drops to required voltage, rooftop placard and label installed | Missing placard or MLPE not programmed/activated |
| Grounding and bonding | EGC continuous from array to service, racking bonded with listed hardware, ground electrode connection | Self-tapping screws used instead of listed lay-in lugs |
| Wire management | Conductors supported off the roof, sunlight-rated cable in conduit or clipped under modules, no abrasion points | Cables resting on shingles or zip-tied loosely under the array |
| AC side and breakers | Backfeed breaker size and bus position match plan, AC disconnect accessible near meter if required, torque on lugs | Wrong breaker size, breaker not at opposite end of busbar |
| Labels and placards | Dual-power-source directory at service, DC conduit labels, inverter and disconnect labels per NEC 690.56 and 705.10 | Faded handwritten labels or missing directory placard |
| Equipment match | Installed panels and inverter match the make and model on the approved permit | Substituted equipment without a permit revision |
That last row catches people. If your installer swaps a panel model because of supply constraints after the permit is issued, the permit drawings must be revised before inspection. An inspector who finds a 450 W module on the roof where the plans show a 430 W module can fail the inspection on the spot, even when the substitution is electrically identical. Keep the permit set updated and the inspection is usually a formality.
Installer Field Note — The Walkthrough Habit
My crews run a 12-point self-inspection the morning before the inspector arrives: rafter hits, flashing, setbacks, rapid-shutdown test, EGC continuity, conduit straps every 3 ft, breaker torque, label audit, equipment model match, monitoring handshake, and photos of everything. It takes 45 minutes. I have not failed a final inspection in two years, and the photo file doubles as documentation for the homeowner's insurance and any future warranty claim.
One of the most significant developments in solar permitting in recent years is SolarAPP+, a free online platform developed by the National Renewable Energy Laboratory (NREL). SolarAPP+ allows municipalities to instantly review and approve standard residential solar permit applications through an automated code compliance engine. Municipalities that use SolarAPP+ can issue permits in under 24 hours compared to the weeks or months it takes with a manual review process.
As of 2026, over 350 municipalities across the United States have adopted SolarAPP+, including cities in California, Arizona, Colorado, Florida, and New York. The platform checks permit applications against the current version of the NEC and IBC automatically, flags any issues, and issues approval certificates that local AHJs can accept directly. For installers, submitting through SolarAPP+ municipalities dramatically shortens project timelines.
SolarAPP+ Key Facts for Installers
- Time to Permit: Under 24 hours in most participating municipalities (vs. 2 to 8 weeks for manual review)
- System Eligibility: Works for standard residential rooftop solar systems up to 50 kW
- Cost: Free for both municipalities and installers
- States with Highest Adoption: California, Arizona, Colorado, Florida, and New York have the most SolarAPP+ municipalities
- How to Check: Visit nrel.gov/solar/solar-app.html to see if your project municipality uses SolarAPP+
- Installer Benefit: Faster permits mean faster installs, faster revenue, and fewer scheduling delays per project
If you are a homeowner waiting for permits or an installer managing project timelines, there are concrete steps that can reduce the time between permit submission and approval.
| Action | Who Does It | Time Saved |
|---|---|---|
| Use an installer who knows your local AHJ | Homeowner (when choosing installer) | 1 to 3 weeks. Experienced local installers know exactly what each building department wants and avoid unnecessary back-and-forth revisions. |
| Submit a complete, error-free permit package | Installer | 1 to 4 weeks. Incomplete applications are the most common cause of permit delays. Every revision cycle adds 5 to 14 days. |
| Use SolarAPP+ if your municipality participates | Installer | 2 to 6 weeks. Automated review can cut permit approval from weeks to hours. |
| Submit HOA application before pulling permits | Homeowner or installer | 1 to 4 weeks. Running HOA review parallel to permit preparation saves sequential wait time. |
| Submit utility interconnection application early | Installer | 2 to 4 weeks. Some utilities allow pre-application submission before installation is complete. Starting this process early avoids a sequential delay. |
| Schedule inspection immediately after installation | Installer | 1 to 2 weeks. Busy building departments sometimes have 1 to 2 week inspection queues. Book the inspection appointment before installation begins. |
Permit fees are set by each municipality and vary considerably. Most residential solar installations incur total permit fees between $100 and $500, though some jurisdictions charge more. Here is what to expect.
| Fee Type | Typical Range | Notes |
|---|---|---|
| Building Permit Fee | $50 to $250 | Some jurisdictions charge a flat fee. Others charge based on project valuation. For solar, the valuation is typically the panel cost only. |
| Electrical Permit Fee | $50 to $200 | Often a flat fee for residential solar. May be combined with building permit in single-permit jurisdictions. |
| Plan Check Fee | $50 to $150 | Some municipalities charge a separate plan check or review fee on top of the permit fee. |
| Inspection Fee | $0 to $100 | Often included in the permit fee. Some jurisdictions charge per inspection visit. |
| Utility Interconnection Fee | $0 to $100 | Most utilities charge nothing for standard residential interconnection. Some charge a small administrative fee. |
| Total Typical Range | $100 to $500 | These fees are included in your installer's quote as a line item or as part of total project cost. You do not pay them separately in most cases. |
Valuation-based fee example: in a jurisdiction that charges 1.5% of project valuation, an $9,000 equipment valuation produces a building permit fee of $9,000 × 0.015 = $135, plus a flat $75 electrical permit and a $100 plan check fee, for a permitting total of $310. The same system in a flat-fee SolarAPP+ municipality might cost $150 all-in. Either way, fees rarely exceed 1 to 2% of a typical $20,000 to $30,000 residential project — the cost of delays from a bad permit package is almost always larger than the fees themselves.
Note for Homeowners: Permit fees paid as part of your solar installation are included in the total project cost that qualifies for the 30% federal Investment Tax Credit. So even if your jurisdiction charges $500 in permit fees, you effectively get 30% of that back through the federal tax credit at tax time.
Some homeowners ask about skipping the permit process to save time or money. This is a serious mistake with real consequences. Here is what can happen.
⚠ Consequences of Installing Solar Without a Permit
- Fines: Most jurisdictions impose significant fines for unpermitted work, often $500 to $5,000 per violation plus retroactive permit fees.
- Forced Removal: A building department can order the system removed and require it to be reinstalled with proper permits and inspections. This doubles your installation cost.
- Insurance Voidance: Homeowner insurance policies typically exclude coverage for unpermitted improvements. An electrical fire traced to an unpermitted solar installation could result in a denied insurance claim.
- Cannot Connect to the Grid: Your utility will not issue Permission to Operate for a system without a final inspection certificate. An unpermitted system cannot legally be connected to the grid for net metering.
- Home Sale Problems: Unpermitted work must be disclosed during home sales and typically must be remediated before closing. Buyers and lenders will not accept unpermitted solar.
- Federal Tax Credit Risk: The IRS requires solar systems to meet all applicable local building codes to qualify for the federal ITC. An unpermitted system may disqualify the credit upon audit.
Do I need to apply for solar permits myself?
No. A licensed solar installer is responsible for preparing and submitting the permit application on your behalf. Pulling the permit is part of the installer's job scope and is included in the project price. What you may need to do is sign an owner authorization form that allows your installer to pull permits on your property. This is standard practice and is not a sign of anything unusual.
How long does the whole process take from signing to turning on?
From contract signing to Permission to Operate, the typical residential solar timeline is 6 to 16 weeks. In the fastest markets using SolarAPP+ and with a prompt utility interconnection process, this can be as short as 4 to 6 weeks. In slow-permit jurisdictions with a backlogged utility, it can take 4 to 6 months. The largest variable is local permitting speed, not the installation itself.
Can my HOA legally block my solar installation?
In most states, no. Over 40 US states have solar rights laws that prohibit HOAs from unreasonably restricting solar installations. HOAs can still require that systems meet aesthetic standards (such as flush-mounted panels or specific panel colors) and can designate which roof surfaces the system may be placed on. But they cannot outright ban solar or impose restrictions that make it economically infeasible. Check your state's solar access laws for the specific protections that apply to you.
What is Permission to Operate and why do I need it?
Permission to Operate (PTO) is the written authorization from your utility company that allows you to turn on your solar system and connect it to the grid. It is issued after the utility has reviewed your completed installation inspection certificate. You cannot legally turn on a grid-tied solar system without PTO, even if your local permits are approved and the installation is complete. The PTO is what activates your net metering account and allows you to start earning bill credits.
Do off-grid solar systems need permits too?
Usually yes. Off-grid systems skip the utility interconnection agreement, but the building and electrical permits still apply in most jurisdictions because the structural roof work and NEC wiring requirements are identical. Some rural counties exempt small off-grid or ground-mount systems under a certain size, so check with your local building department before assuming an exemption. Battery-based off-grid systems have additional NEC Article 706 (Energy Storage Systems) requirements that the electrical plan check will cover. Our home battery bank sizing guide covers the storage side of those projects.
Does my system need a second inspection after utility connection?
In most jurisdictions, a utility meter technician visits after PTO is issued to install a bidirectional meter (if needed) and verify that the system is operating correctly. This is typically not a separate formal inspection with the building department but rather a utility service appointment. Your installer should coordinate this with the utility as part of the project close-out process.
Related Products


Ready to Source Materials for Your Solar Project?
While permits are in review, your material procurement should already be underway. PES Supply stocks Tier 1 solar panels, inverters, battery storage, racking, conduit, breakers, and all balance-of-system components needed to complete a compliant, inspection-ready installation — see our solar panel kits buyer's guide for complete package options. Nationwide delivery from a Louisville, Kentucky supply-house fulfillment network and a 50,000+ SKU catalog.
Shop Solar PanelsRequest a Project QuoteRelated Guides
- Solar Panel Cost: What Should I Actually Pay? - 2026 pricing guide with state comparisons
- How Much Can I Save With Solar Panels? - Calculate annual and lifetime savings
- Solar Installation Guide - Complete system design and installation walkthrough
- Solar Wire and Cable Guide - PV wire vs USE-2 vs THHN selection and NEC compliance
- Circuit Breaker Sizing Guide - Size solar backfeed and disconnect breakers to NEC code
- Request a Quote - Get competitive pricing on Tier 1 panels and project kits
About PES Supply
PES Supply is a nationwide distributor of Tier 1 solar panels, inverters, battery storage systems, EV charging hardware, racking, circuit breakers, generators, and complete electrical project kits. With a catalog of 50,000+ SKUs spanning 169 authorized brands, full OEM warranties, and nationwide LTL freight delivery from our Louisville, Kentucky supply house, Portlandia serves contractors, EPCs, developers, and homeowners with fast delivery and expert procurement guidance.
Location: 1507 Portland Ave, Louisville, KY, United States | Phone: 1 888-876-0007 | Website: www.portlandiaelectric.supply
Article: What Are Solar Permits and How Long Do They Take? Complete 2026 Guide for Homeowners and Installers
Category: Solar Energy | Solar Permits | Solar Installation | Interconnection | Residential Solar
Last Updated: August 2026 - Based on NREL Solar Permitting Best Practices, SolarAPP+ Data, NEC Articles 690 and 705, and State-Level AHJ Research
Disclaimer: Permit timelines, fees, and requirements vary by jurisdiction and are subject to change. Always verify current requirements with your local building department and your licensed solar installer before beginning a project.
Related Resources:
- Best Solar Panels 2026 — Buyer's Guide
- EG4 vs Tesla Powerwall
- Qcells vs Trina vs JA
- Solar Inverter Buyer's Guide
- Solar Battery Buyer's Guide
- 5kW Solar Kit
- 10kW Solar + Battery Kit
- Off-Grid Cabin Kit
- EG4 Batteries
- Qcells Solar Panels
- Trina Solar
- JA Solar
- REC Solar
- Mission Solar
- Sol-Ark Inverters
- SolarEdge Inverters
- Generac PWRcell
Calculate how much storage you need with our battery sizing calculator.
Check solar incentives available in your state.
Use our free solar system calculator to size your array.
Check out our Solar Panel Comparison Tool. Check out our Inverter Sizing Calculator.
Calculate your solar payback and 25-year savings with our Solar ROI Calculator. Follow our complete DIY solar installation guide for step-by-step instructions. Keep your system running at peak performance with our Solar Maintenance Guide.
Related Resources
- Solar System Calculator
- Battery Sizing Calculator
- Solar Panel Comparison Tool
- Inverter Sizing Calculator
- Solar ROI Calculator
- Solar Installation Guide
- Solar Maintenance Guide
- Solar Permitting Guide
- Battery Installation Guide
- NEC Code Compliance Guide
- Solar Panel Mounting Guide
- Grounding & Bonding Guide
- Solar Incentives by State
- Pro Account — Wholesale Pricing
- PowerLink Network — Contractor Program
What size solar panel do I need?
Sizing depends on your daily energy consumption, available roof space, and peak sun hours in your area. A typical home uses 15-25 panels (400W each) for full offset. Call (502) 790-0600 for a free sizing consultation.
How much do solar panels cost in 2026?
PES Supply distributes panels from major manufacturers including Jinko, Mission Solar, and more. Pricing varies by wattage and quantity. Request a quote for current pricing.
Do you offer BABA-compliant solar panels?
Yes. PES Supply provides BABA documentation at no extra charge. All our solar products meet Build America, Buy America requirements.
PES Supply carries a catalog of 50,000+ SKUs from 169 authorized brands. One PO, one invoice, every trade covered.
Need help sizing? Our team can calculate loads, select equipment, and source everything from one PO.
Call (502) 790-0600