Can I Install Solar Panels Myself? Expert Tips to Save Big Today
By the PES Supply Editorial Team

Thinking about going solar and wondering, "Can I install solar panels myself?" You're not alone — and the honest answer is: yes, legally and technically, in most of the United States, if you're willing to pull permits, pass inspections, and do the electrical work to code. The savings are real. So are the ways to get hurt, fail inspection, or void your roof warranty. I've watched competent DIYers finish clean grid-tied systems that sailed through final inspection, and I've been called in to untangle DIY jobs where the array worked fine but the paperwork, the grounding, and the rapid shutdown were a mess. This guide gives you the full picture — savings math, tools, roof assessment, the step-by-step process, safety rules that aren't optional, and a clear-eyed look at when hiring a pro is the cheaper decision.
Cost Savings
Cost savings. Labor, overhead, and installer margin typically run 15–25% of a residential system's price. On an 8 kW system quoted at $24,000 installed, the DIY path realistically saves $4,000–$8,000 after you pay for tools, permits, and the equipment itself at contractor-grade pricing. That's a used car, not a rounding error.
Knowledge and control. You'll understand every component in your system — which matters for the next 25 years of ownership, troubleshooting, and expansion. You choose every part instead of accepting whatever the sales-driven installer margins hardest.
Schedule control. No waiting six weeks for an install crew. The trade: you'll spend 3–5 full days of physical work plus evenings of paperwork, and the project moves at your pace — for better and worse.
| Line Item (8 kW system) | Professional Install | DIY Install | Notes |
|---|---|---|---|
| Equipment (panels, inverter, racking, BOS) | included in quote | $10,000–$13,000 | Buy at contractor pricing from a distributor like PES Supply |
| Labor + installer overhead/margin | included | $0 (your time) | The savings you're capturing |
| Permits, engineering, interconnection fees | included | $500–$1,500 | Varies widely by AHJ and utility |
| Tools (buy or rent) | — | $300–$800 | Torque wrench, crimpers, multimeter, fall protection |
| Typical total | $22,000–$28,000 | $11,000–$15,500 | DIY saves roughly $4,000–$8,000 realistically |
Two honesty notes. First, the headline "$0.90/watt DIY" stories usually skip permits, tools, mistakes, and your time. Second, one red-tagged inspection requiring an electrician to fix grounding or a panel de-rate can eat a third of the savings in a day. Budget a contingency.
Secure Panels Properly
| Component | Description |
|---|---|
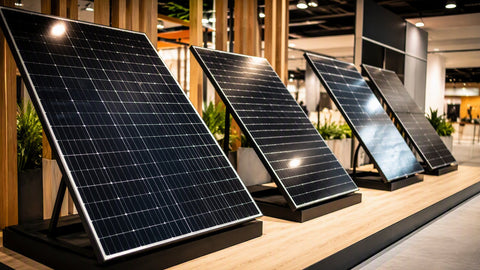
| Solar Panels | Collect sunlight and turn it into electricity. |
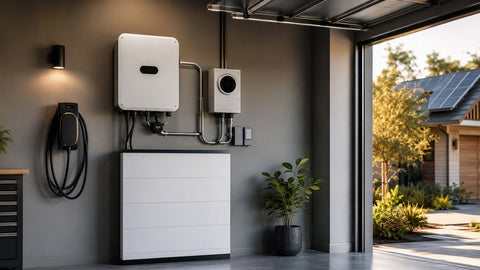
| Inverter | Converts solar energy from DC to AC for home use — string, microinverter, or hybrid. |
| Mounting Brackets / Racking | Hold the panels securely on the roof against wind and snow loads. |
| Wiring | Connects all parts to carry electricity safely — PV wire, THHN-2 in conduit, proper connectors. |
| Charge Controller | Regulates battery charging to avoid damage (off-grid and hybrid systems only). |
Solar Panel Components
Beyond the components, the tool list that separates a code-passing job from a callback: a calibrated torque wrench (racking and electrical terminations have specs — "hand tight" fails inspections and starts fires), an MC4-compatible crimper matched to your connector brand, a Cat III/IV-rated multimeter, a clamp meter for commissioning, roof fall protection (harness, rope, anchor — see the safety section, twice), and a label maker for the placards NEC 690 requires. Our solar installation guide and panel wiring basics cover the wiring side in depth, and the racking and mounting inventory carries the hardware.
Before a single panel ships, honestly answer four questions:
Is the roof young enough?
Solar outlives shingles. A roof with fewer than 10 years of life left should be re-roofed first — removing and reinstalling an array for a re-roof costs $2,000–$5,000 and erases a chunk of your DIY savings.
Can the structure carry it?
Panels plus racking add roughly 2.5–3.5 lb/ft². Most code-built modern roofs handle it; older or undersized rafters, long spans, and heavy existing layers (multiple shingle roofs, tile) need a structural look. When in doubt, a $300 engineer's letter beats a sagging ridge line.
Is the sun actually there?
South-facing, unshaded, 15–40° pitch is ideal in the northern hemisphere. Use a shade analysis tool or a full-day site visit across seasons — a December shadow pattern at 3 p.m. surprises people every year.
Will your AHJ and utility let you?
Most jurisdictions allow owner-builder electrical work on your own residence; some require a licensed electrician for the final service connection, and a few utilities restrict interconnection to licensed installers. Call both before buying equipment — five-minute phone calls that save five-figure mistakes.
The sequence below is the one that passes inspection. Every step has a failure mode we cover after it.
Step 1 — Design, permits, and interconnection application
Size the system with the solar system calculator, draw the plan set (array layout, single-line diagram, structural attachment detail), pull building and electrical permits, and file the utility interconnection application. Start interconnection early — some utilities take longer to approve the paper than you'll take to build the array.
Step 2 — Locate rafters and install attachments
Find every rafter with a stud finder or pilot holes from the attic, snap chalk lines, and set flashing-mounted attachments into rafter centers — never into sheathing alone. A lag into 7/16" OSB is a future leak and a pulled-out attachment in the first real windstorm.
Step 3 — Mount rails and racking
Level and square the rails to the manufacturer's torque spec (typically 12–15 ft·lb on stainless M8 hardware). Check torque on every bolt with the calibrated wrench and mark each one with a paint pen — inspectors notice, and six months of thermal cycles reward it.
Step 4 — Set and clamp the modules
Two people per module on anything bigger than a garage roof. Clamp at the zones the module manufacturer specifies — clamping outside the zone voids the mechanical-load warranty and cracks glass months later.
Step 5 — Wire the array (DC side)
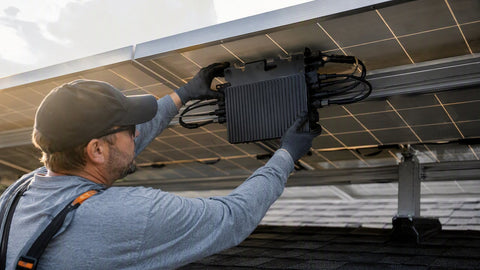
Make MC4 connections with the matched crimper, route PV wire in UV-rated conduit where required, and land strings on the inverter or rapid-shutdown equipment. Every string is live the moment it's assembled — treat it that way from the first connection.
Step 6 — Inverter, disconnects, and service tie-in (AC side)
Mount the inverter, install the AC disconnect within sight, and make the interconnection per NEC 705.12 — load-side breaker within the 120% rule or a supply-side tap. This is the step most AHJs and utilities restrict to licensed electricians; know your local rule before this morning, not during it.
Step 7 — Inspection, PTO, and commissioning
Pass the AHJ inspection, get the utility's Permission to Operate, then commission: verify string voltages and polarity, enable monitoring, set the grid profile your utility requires, and label everything NEC 690 asks for. Do not energize before PTO — utilities do catch it, and the fines are real.
6. Safety Precautions That Are Not Optional

I'm putting this section in bold terms because the two hazards below send DIYers to the hospital every year:
Falls: the #1 risk on any roof job
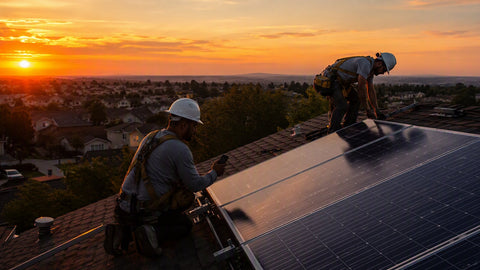
OSHA requires fall protection above 6 feet on professional jobs for a reason — gravity doesn't check whether you're getting paid. Harness, rope grab, and a rated anchor lagged into a rafter, every time you're on the roof. A $150 fall-protection kit is the cheapest line item in this entire project.
DC electricity: silent, lethal, always on
A 10-module string sits at 350–450 V DC in daylight and cannot be switched off at a breaker. DC arcs sustain themselves — a bad MC4 connection becomes a welding arc. Wear gloves and eye protection for DC connections, verify with a meter before touching, work strings in low light where practical, and never break a connection under load.
Use Safe Ladder Practices
Add the obvious trio: ladder safety (tied off, 1:4 angle, three points of contact), heat management (roof surfaces run 30–50 °F over ambient — water and shade breaks are schedule items, not luxuries), and lifting technique (a 45-lb module in a gust is a sail; two-person carries on two-story roofs).
Inspectors check the same items on DIY jobs as pro jobs. Know these before rough-in:
| Code Item | Requirement (NEC 2023/2026) | Where DIY Jobs Fail |
|---|---|---|
| Conductor sizing (690.8) | Isc × 1.25 × 1.25 continuous and conditions of use | Undersized string wire on hot roofs |
| Rapid shutdown (690.12) | Conductors ≤30 V within 30 s inside array boundary | Missing RSD on string systems; wrong initiator location |
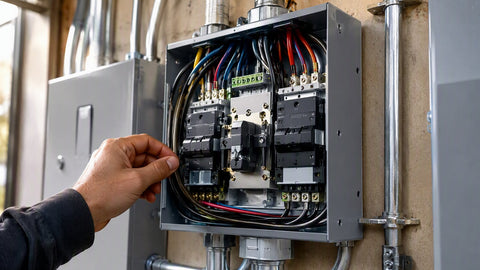
| Grounding/bonding (690.41–.47, 250) | Listed bonding hardware; continuous EGC | Self-tapping screws instead of listed lugs/weEBs |
| Interconnection (705.12) | 120% rule for load-side; taps per 705.11 | Backfeed breaker not at opposite end of bus; oversized solar breaker |
| Labels (690.13, 690.31, 705.10) | Placards at service, disconnects, conduit | No labels — the cheapest failed inspection there is |
Our NEC code compliance guide, wire sizing and ampacity guide, grounding and bonding guide, and NEC 690 disconnect guide walk each of these with the actual tables. Read them before you buy wire.
| Challenge | How It Shows Up | The Fix |
|---|---|---|
| Permit plan set rejected | AHJ wants stamped structural or electrical drawings | Use a plan-set service ($150–$400) or a local engineer for the stamp |
| Utility interconnection delays | Array built, no PTO for weeks | File the application before equipment arrives; call the utility's interconnection desk weekly |
| Rafter misses | Lag bolt spins free — you hit sheathing | Verify from the attic; move the attachment; seal the miss with roofing sealant |
| Shade you didn't model | Afternoon string collapse from one chimney | Microinverters or optimizers on the affected section — see our microinverter inventory |
| Panel can't take the backfeed | 120% rule exceeded on a full 200 A bus | Panel de-rate, line-side tap, or main breaker downsizing by an electrician |
Before you commit, make three phone calls that most DIY guides skip:
- Your homeowner's insurance agent. Some carriers require proof of permitted, inspected installation to cover the array — and a few exclude coverage for owner-installed electrical work entirely. A denied claim on a roof fire is not the savings plan you had in mind. Get the answer in writing before you buy panels.
- Your roofing warranty holder. Many shingle and membrane warranties require attachments by certified installers. DIY penetrations can void a roof warranty with 15 years left on it — read the warranty document, not the marketing sheet.
- The equipment manufacturers. Panel and inverter product warranties generally cover DIY-installed equipment, but workmanship — the leaks, the loose clamps, the mis-torqued lugs — has no warranty at all when you're the workmanship. That risk is yours to price honestly.
None of these are reasons not to DIY. They're reasons to DIY with your eyes open and your paperwork in order.
The job isn't done at PTO — it changes shape. Set up the monitoring platform the day you energize and learn what normal looks like: a clear-day production curve for your array, seasonal expectations, and what an alert means. Most "my solar stopped working" calls resolve to a tripped breaker, a failed rapid-shutdown initiator, or a Wi-Fi change that silenced the monitoring while production kept humming. Our solar maintenance guide covers the full ownership checklist.
Physical maintenance is minimal but not zero: visual inspection twice a year for loose clamps, conduit damage, and critter nests (squirrels love warm junction boxes; install critter guard on day one, not after the first chewed string), panel washing only where soiling actually costs you production, and a torque re-check on accessible hardware after the first year of thermal cycles. Budget an inverter replacement somewhere in years 10–15 for string units — it's the component with the shortest design life in the system, and planning for it beats being surprised by it.
Hire out — fully or for specific phases — when any of these are true:
- Your AHJ or utility requires licensed installation for interconnection or the service tie-in. Many DIYers self-install the array and hire an electrician for steps 6–7; that's a legitimate hybrid that keeps most of the savings.
- The roof is steep, high, or fragile. Third stories, 8:12+ pitches, and brittle tile belong to crews with the right equipment and the insurance to match.
- You want battery storage with whole-home backup. Critical-load panels, transfer equipment, and hybrid inverter programming have a failure cost that dwarfs the labor savings — start with our battery buyer's guide and price it honestly.
- Your time has a better use. Three to five working days plus paperwork has a dollar value. Sometimes the pro quote is the savings.
Either way, buy the equipment smart: DIY customers get contractor pricing at PES Supply across solar panels, inverters, racking, and the full balance of system — 50,000+ SKUs, 169 authorized brands, 7–10 business day delivery. Start with a solar panel kit if you want the BOM pre-matched, or request a quote for a custom bill of materials. One more piece of free advice from the counter: order 5% extra on connectors, clamps, and mid-clamps. The install day you finish without a hardware-store run is the day the plan survived contact with the roof — and a $40 spare-parts buffer is what makes that day possible.
Is it legal to install solar panels yourself?
In most U.S. jurisdictions, yes — owner-builders may perform electrical work on their own residence with permits and inspections. Some AHJs require a licensed electrician for the service connection, and some utilities restrict interconnection to licensed installers. Call your building department and utility before buying equipment.
How much can I really save with DIY solar?
Realistically $4,000–$8,000 on an 8 kW system after permits, tools, and equipment at contractor pricing — roughly 15–25% of a pro-installed price. Headline claims of bigger savings usually ignore permits, tools, contingencies, and your time.
Do DIY solar systems qualify for incentives?
Equipment eligibility for state and utility incentives generally doesn't depend on who installs, but many programs and the former federal credit rules have installer or certification requirements — verify current program rules before counting any incentive in your budget.
What's the hardest part of a DIY install?
Not the physical work — the paperwork and the service tie-in. Plan sets, permit revisions, interconnection approval, and the NEC 705.12 service math are where DIY projects stall. The roof work is tiring; the electrical code work is what's actually hard.
Can I connect my DIY system to the grid?
Only with utility Permission to Operate. Energizing before PTO violates your interconnection agreement and can trigger fines and forced disconnection. File the interconnection application before construction, not after.
What happens if I sell the house with a DIY system?
Permitted, inspected, PTO'd systems transfer cleanly and add value. Unpermitted DIY systems surface in every buyer's inspection and routinely force price concessions or removal. Pull the permits — your future self at the closing table will thank you.
PES Supply (https://www.portlandiaelectric.supply) is a B2B electrical and solar distributor — 50,000+ SKUs from 169 authorized brands, sold at contractor pricing to pros and serious DIYers alike. Verify all code requirements with your AHJ; this guide is educational, not a substitute for the adopted NEC and local amendments.