For solar installers, EPCs, and procurement managers, solar wiring connectors are the single most critical point of failure in any array. While seemingly minor, a single bad connection can trigger catastrophic system failure, void warranties, and create significant fire hazards. This guide provides a no-fluff, field-tested framework — we've installed thousands of these connectors across Oregon and Washington, and I've personally tracked down arc faults caused by nothing more than a mismatched MC4 pair. for selecting, installing, and procuring connectors to ensure every project is safe, code-compliant, and built for maximum long-term energy harvest. It's designed to help you eliminate risk at the component level, pass inspections the first time, and protect your project's profitability.
Why Your Connector Strategy is Critical for Project Success
For any solar installer, EPC, or project manager, solar wiring connectors are far more than just plastic parts. They are the linchpin holding together a project's safety, bankability, and long-term performance. One poorly crimped or mismatched connector can introduce high resistance, become a serious fire hazard under NEC guidelines, and lead to system-wide failure.
Choosing the wrong connector, or worse, mating connectors from different brands (a direct NEC violation), is a fast track to failed inspections, voided panel and inverter warranties, and expensive truck rolls to troubleshoot intermittent power loss. These seemingly small mistakes snowball into major project delays and put a real dent in your reputation and profitability.
The Real-World Impact on LCOE and Bankability
In today's competitive solar market, a bulletproof connector strategy is essential. Every connection point is a potential point of failure, and the integrity of these connections directly impacts the project owner’s Levelized Cost of Energy (LCOE). High resistance from a poor crimp or water ingress from a mismatched seal causes tangible energy losses that compound over the 25+ year life of the system.
For Developers & EPCs: On a commercial or utility-scale project, even a fractional power loss from high-resistance connections translates to thousands of dollars in lost revenue. This is why standardizing your connector procurement and installation protocol is a critical risk-management task, not just another line item on the Bill of Materials (BOM).
The solar industry's explosive growth has put an even bigger spotlight on component quality. The market for solar connectors is expected to hit USD 1.09 billion in 2025 and is projected to climb to USD 1.82 billion by 2030. This boom underscores the urgent need for strict quality control and sticking to best practices. You can discover more insights about the solar connector market on knowledge-sourcing.com.
Key Decision Factors for Solar Connectors
The right choice affects everything from installation speed on the roof to the project's financial health for decades. This table cuts through the noise to show what really matters for project decision-makers.
| Factor | Importance for Installers & EPCs | Impact on Project Success |
|---|---|---|
| Code Compliance (NEC) | Prevents failed inspections, costly rework, and liability. Ensures legal, safe operation. | Essential for commissioning, insurance, and project bankability. A non-negotiable. |
| Brand Compatibility | Avoids dangerous intermating, fire risks, and immediate warranty voids from brands like Sungrow or Fronius. | Guarantees system integrity, safety, and long-term reliability under manufacturer terms. |
| Weather Resistance (IP Rating) | Ensures durability against rain, dust, and UV exposure. Prevents water ingress and arc faults. | Critical for minimizing O&M costs and preventing premature component failure. |
| Tooling Requirements | Using manufacturer-specified crimpers (e.g., Stäubli) creates reliable, low-resistance connections. | Directly affects installation quality, speed, and eliminates future service calls. |
Ultimately, enforcing discipline on these factors is about building a robust, reliable, and profitable solar asset from the ground up.
Decoding Connector Types and Industry Standards
For anyone making procurement decisions or managing an installation crew, getting the details right on solar wiring connectors is non-negotiable. While various types exist, the industry has standardized around the MC4 connector and its newer variants for good reason—they are engineered for the harsh environments solar arrays endure.
A genuine MC4 is a complete system: a male and female housing, a metal contact pin, a cable gland, and a sealing ring. Assembled correctly with the proper tooling, it creates a watertight, dust-proof connection with an IP67 or IP68 rating. That seal is what prevents moisture damage, corrosion, ground faults, and dangerous arc faults. This critical connection happens at the solar panel junction box, the nerve center for the panel's wiring.
The Anatomy of Performance: MC4 vs. MC4-Evo2
The classic MC4 connector has been the workhorse for years, but the MC4-Evo2 is engineered for the future. Both are made by Stäubli, but the Evo2 supports systems up to 1500V DC. This is a major advantage for commercial and utility-scale projects, as higher voltage allows for longer panel strings, directly reducing Balance-of-System (BOS) costs like combiners and wiring.
The key differences are in the engineering:
- Housing: Both use high-quality, UV-resistant plastics, but the Evo2 is reinforced for higher ambient temperatures and greater physical durability.
- Sealing: Precision-molded internal sealing rings create a perfect, unbreachable seal around the PV wire’s insulation.
- Contact Pins: Made from tin-plated copper to ensure the lowest possible electrical resistance, minimizing heat buildup and maximizing power transfer.
For Procurement Officers: When specifying connectors for your Bill of Materials (BOM), demand UL 6703 certification. This is the U.S. benchmark proving the connector has passed rigorous testing for voltage, temperature cycling, aging, and fire resistance. A UL listing is a non-negotiable for passing inspections, securing project financing, and meeting insurance requirements.
Matching Connectors to Wire Gauge
Specifying the right connector isn't just about the brand; it must be matched to the specific American Wire Gauge (AWG) of your PV wire. Most solar projects use 10 AWG or 8 AWG PV wire.
Forcing a 10 AWG connector onto thicker 8 AWG wire is impossible. Using an 8 AWG connector on thinner 10 AWG wire will create a loose seal—an open invitation for moisture and a high-resistance hot spot. This reality is shaping the market, with projections showing the solar PV connectors market is set to hit USD 2.29 billion by 2033. The 8 AWG segment is a major part of that growth, claiming about 35% of the market as it becomes the standard for high-capacity jobs. You can read the full research on solar PV connector market trends to see where things are headed.
This is why manufacturers have distinct part numbers for connectors designed for specific wire gauges. Your BOM must be precise. Don’t just list "MC4." Specify the exact part number that matches your PV wire gauge. Getting this right upfront saves costly mistakes in the field.
MC4 Connector Specifications by Voltage and Current Rating
| Connector Type | Max Voltage (DC) | Max Current (A) | Wire Gauge Range | IP Rating | Best Application |
|---|---|---|---|---|---|
| MC4 Standard | 1,000V | 30A | 14–10 AWG | IP67 | Residential arrays up to 10 kW |
| MC4-Evo2 | 1,500V | 45A | 12–8 AWG | IP68 | Commercial arrays, 1,000V+ systems |
| MC4-EVO3 | 1,500V | 70A | 10–6 AWG | IP68 | Utility-scale, high-current strings |
| T4 Connector | 1,000V | 20A | 16–12 AWG | IP67 | Microinverters, AC modules |
Connector Torque Specifications and Wire Prep
| Wire Gauge (AWG) | Strip Length (mm) | Crimp Force Range (kN) | Torque on Housing (N·m) | Pull Test Force (N) |
|---|---|---|---|---|
| 14 AWG | 7–8 | 8–10 | 2.0–2.5 | ≥50 |
| 12 AWG | 8–9 | 10–13 | 2.5–3.0 | ≥80 |
| 10 AWG | 9–10 | 13–16 | 3.0–3.5 | ≥100 |
| 8 AWG | 10–11 | 16–20 | 3.5–4.0 | ≥130 |
Field note: I watched a crew try to crimp MC4 pins with a generic automotive crimper last fall. Half the connections failed the pull test. We stopped the job, brought out the Stäubli crimper, and redid every single one. The right tool costs $200; one callback costs $2,000. Do the math.
Avoiding Critical Mistakes with Mismatched Connectors
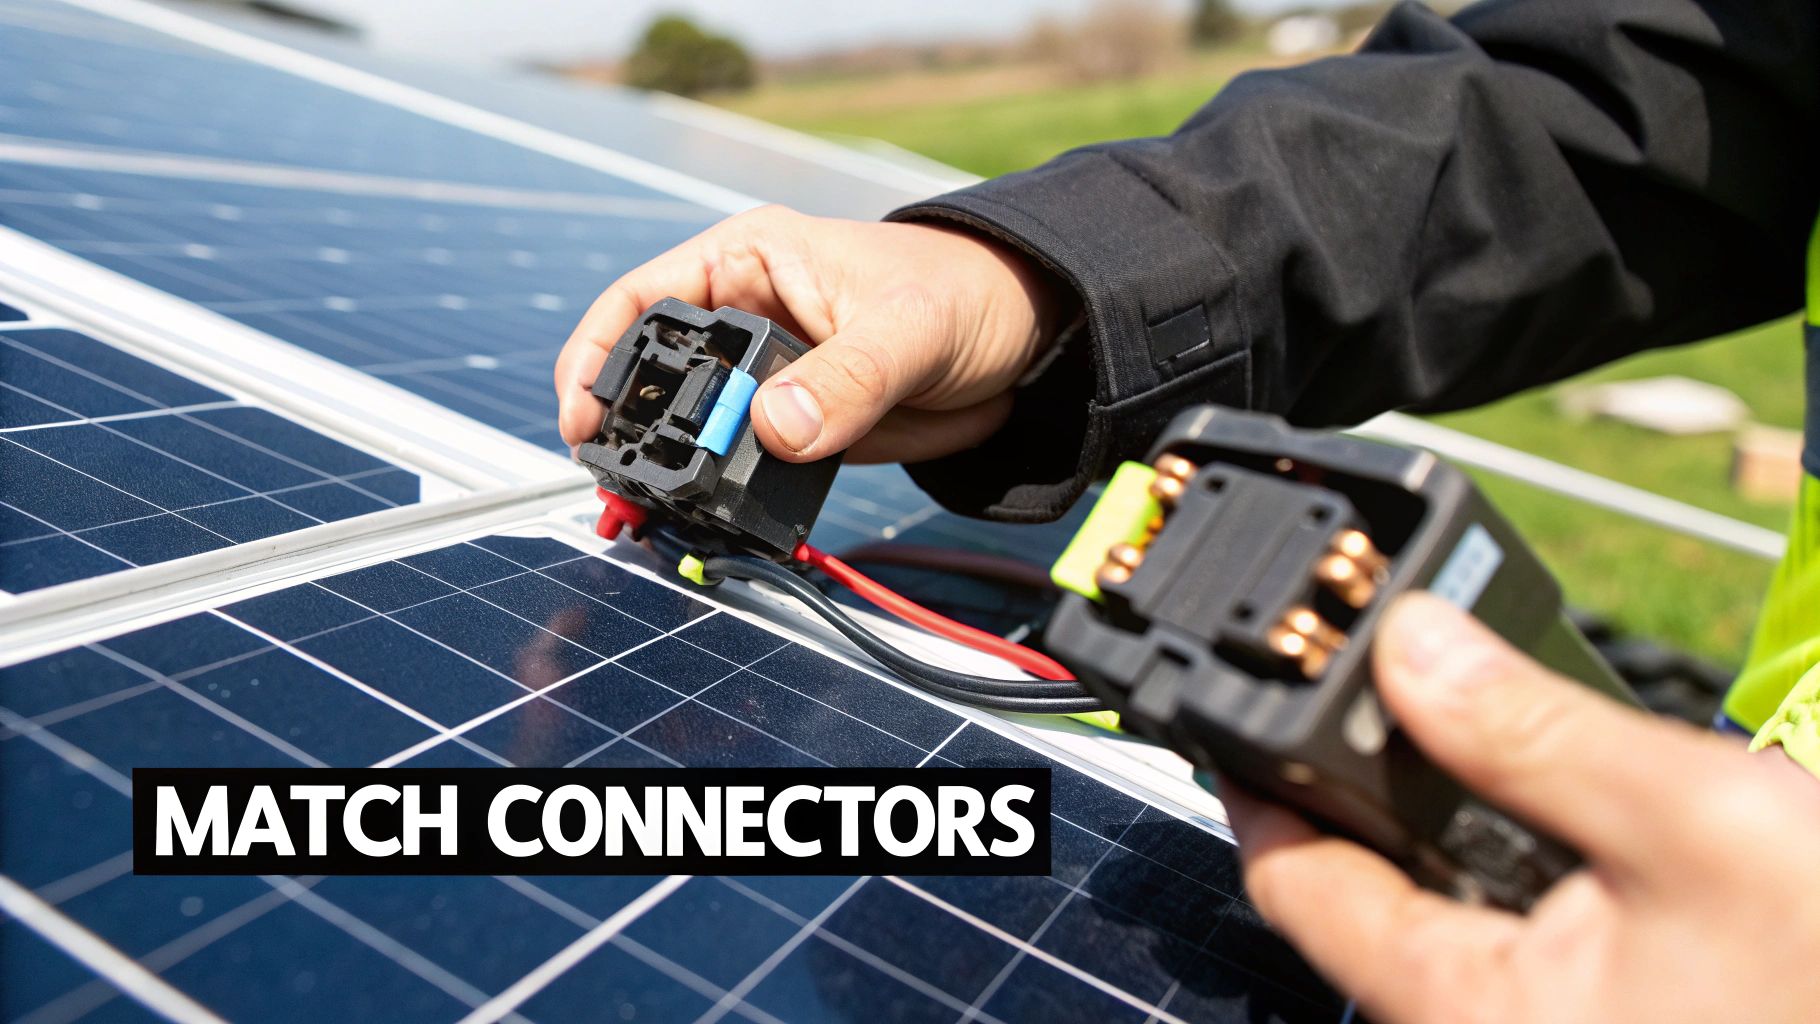
One of the most dangerous and common field mistakes — we see it on almost every third-party inspection we do — is mating solar connectors from different manufacturers. is mating solar connectors from different manufacturers. This is a direct violation of NEC Article 690.33, a guaranteed inspection failure, and a serious fire hazard.
The term "MC4-compatible" does not mean "MC4-certified." Different brands may look identical, but microscopic differences in their internal dimensions, plastic compounds, and metal contacts create an improper seal and a point of high electrical resistance when forced together. Over time, moisture ingress causes corrosion, driving resistance even higher. This connection point becomes a resistor, generating enough heat to melt the housing, create an arc fault, and potentially ignite a fire.
The Real Cost of Intermating: Warranty Voids and Shutdowns
The fallout from intermating extends far beyond a failed inspection. A single mismatched connection can instantly void the warranties for both the solar panel and the inverter, leaving the installer liable for all future issues. Troubleshooting intermittent power loss caused by a single bad connection is an operational nightmare.
This isn't hypothetical. Recent reports show a shocking 83% of solar projects encounter connector-related issues, with 3% of those incidents leading to complete system shutdowns. The problem is so pervasive that the industry is pushing for factory-installed, certified connectors to build reliability in from the start. You can dig into these photovoltaic market findings to see the full scale of the problem.
Compliance Watchout: NEC 690.33(C) is unambiguous. It requires connectors to be part of a listed system and mated only with identical connectors from the same manufacturer. An inspector spotting mixed brands is an immediate red flag, leading to failed inspections, costly rework, and painful project delays.
A Job Site Checklist for Verifying Compatibility
Every project manager must enforce a strict connector protocol. Use this checklist on every job site to guarantee 100% compatibility and compliance.
- Standardize Your Buys: Mandate a single brand (e.g., all Stäubli MC4) for panels and extension cables in your Bill of Materials (BOM).
- Segregate Inventory: If you must stock multiple brands, keep them in clearly labeled, separate bins. Never mix them in a tool bag or truck box.
- Mandate a Field Check: Train your crew to physically check for the manufacturer's name or logo on both the male and female connector housings before mating them. If they don't match, they don't connect. Period.
- Document for Compliance: Take photos of connector markings as part of your standard project documentation. This provides undeniable proof of compliance for inspectors and any future warranty claims.
Connector Mismatch Risk Assessment
The choice between using matched or mismatched connectors has a direct impact on project safety, performance, and financial viability.
| Risk Factor | Mismatched Connectors (High Risk) | Brand-Matched Connectors (Low Risk) |
|---|---|---|
| Safety | High risk of arc faults and fire due to poor contact and heat buildup. | Low-resistance connection minimizes heat and ensures safe operation per UL standards. |
| Performance | Increased resistance leads to voltage drops and significant, cumulative energy loss. | Maximum power transfer and optimal LCOE over the system's lifetime. |
| Warranty | Voids both panel and inverter warranties, shifting all liability to the installer. | Maintains full manufacturer warranty coverage for all system components. |
| Compliance | Guaranteed NEC 690.33 violation, leading to failed inspections and costly rework. | Fully compliant with national and local codes, ensuring a smooth inspection process. |
Enforcing connector discipline is one of the easiest ways to eliminate unnecessary project risk and deliver a system that is safe, reliable, and built to last.
Mastering Crimping Tools and Installation Techniques

A weatherproof, low-resistance connection is a direct result of using the right tool for the job. In solar installations, the crimping tool is as critical as the connector itself. Using generic pliers or an unapproved crimper is a surefire way to build a high-resistance weak link into the array that will fail over time.
These weak links generate heat, degrade production, and compromise the connector's weatherproof seal, inviting moisture that leads to corrosion, ground faults, and catastrophic arc faults. For a connection to survive 25 years on a rooftop, precision is non-negotiable.
The Right Tool for a Perfect Crimp
Every major connector manufacturer, like Stäubli with their MC4 line, designs and sells a specific crimping tool engineered to work perfectly with their connectors. These are precision instruments that apply the exact force needed to forge a perfect cold weld between the wire’s copper strands and the metal contact pin. A generic, all-purpose crimper will either under-crimp, leaving gaps that increase resistance, or over-crimp, damaging the wire strands and weakening the connection.
Pro Tip for Installers: A proper crimp from a manufacturer-specified tool is so solid that the wire itself will snap before the crimp fails. After making a connection, perform a firm "pull test." If the pin comes off the wire, your crimp is bad—and you’ve just saved yourself a costly future truck roll.
A Step-by-Step Guide to Flawless Connector Assembly
Building a bulletproof connector is a methodical process. Rushing any of these steps compromises the entire connection. Follow this checklist for every connector to guarantee quality and safety.
-
Prepare the Wire: Use a high-quality wire stripper to remove the exact length of insulation specified by the connector manufacturer (typically 1/2 inch). Do not nick or cut any copper strands, as this creates an immediate point of failure.
-
Crimp the Contact Pin: Insert the stripped wire into the metal contact pin. Place the pin into the correct die on your manufacturer-spec crimping tool and squeeze firmly until the tool's ratchet mechanism clicks and releases, ensuring a complete, uniform crimp.
-
Assemble the Housing: Slide the cable gland over the wire. Then, insert the crimped pin into the back of the correct male or female connector housing until you hear and feel a distinct "click" as it locks securely.
-
Seal the Connection: Hand-tighten the cable gland onto the back of the housing. Then, use the plastic disconnect/tightening tools for a final quarter-turn. This compresses the internal rubber seal, creating the vital weatherproof barrier.
Visual Cues of a Perfect Connection
After assembly, a quick visual inspection confirms a quality job. The crimp on the pin should be clean and uniform with no stray wire strands. The cable gland should sit flush against the connector housing with no visible gaps. Getting these details right is fundamental to any professional installation. You can build a solid foundation of knowledge in our guide to solar panel wiring basics.
Troubleshooting Common Connector Failures
When a solar array underperforms, every connection point becomes a suspect. A single faulty solar wiring connector can introduce enough resistance to cripple an entire string, leading to lost production, client complaints, and a frustrating diagnostic chase for O&M technicians.
Connector problems are rarely dramatic; they are insidious. They manifest as anomalies in performance data: an unexplained voltage drop in one string, production dips on cloudy days, or stubbornly low output. The usual culprits are water ingress past a bad seal, corrosion on the contact pins, or metal fatigue from thermal cycling.
Diagnosing the Root Cause
If monitoring data flags a specific string as an underperformer, a methodical, hands-on inspection is required to pinpoint the failure.
- Initial Data Review: Confirm the performance drop is isolated to one string to rule out system-wide issues like shading or an inverter fault.
- Safety First: Before touching any wiring, follow your lockout/tagout (LOTO) procedures. De-energizing the circuit is a non-negotiable safety step.
- Visual Inspection: Get eyes on the hardware. Start at one end of the problem string and inspect every connector for discoloration, melted or warped plastic, and signs of water or corrosion.
- Voltage Check: With the string safely isolated, use a multimeter to check the open-circuit voltage (Voc) of individual panels or small groups of panels. A significant voltage drop between two test points indicates a high-resistance fault is located in that segment.
Expert Tip for O&M Teams: A high-resistance connection acts as an unwanted resistor in the circuit. Under load, this "resistor" chokes the voltage before it reaches the inverter, killing power output. This is why a string can show a perfect open-circuit voltage but produce nothing once connected to the load.
Best Practices for Connector Replacement
Once you’ve found the faulty connector, a by-the-book replacement is the only solution. Cutting corners here guarantees a repeat service call.
Field Replacement Checklist:
- De-energize: Verify the circuit is completely de-energized and locked out.
- Remove Old Connector: Cut the wire, leaving enough slack to work with.
- Prep the Wire: Strip the PV wire insulation to the exact length specified for the new connector.
- Crimp a New Pin: Use the correct, manufacturer-specified crimping tool to create a solid, cold-weld connection. Perform a pull test to confirm its integrity.
- Assemble and Seal: Insert the crimped pin into the new, brand-matched housing until it clicks into place. Tighten the sealing nut to create a perfect weatherproof seal.
- Reconnect and Test: Re-energize the circuit when safe and verify in the monitoring platform that performance has been restored.
Following a disciplined troubleshooting and repair process allows technicians to resolve issues quickly and safely, restoring system uptime and protecting the long-term health of the solar asset.
Sourcing and Procuring Connectors for Your Project
For procurement managers and EPCs, sourcing solar wiring connectors is about managing risk, not just price. Your procurement strategy is the first line of defense against costly field errors and supply chain disruptions.
Ordering in bulk from a trusted partner like PES Supply ensures component consistency across the entire job site. This eliminates the risk of counterfeit or mismatched connectors appearing on site—a common problem that causes failed inspections and significant safety hazards.
The Procurement Checklist for Your Bill of Materials
A highly detailed Bill of Materials (BOM) is non-negotiable and is a cornerstone of effective contract management best practices. It must specify not just the brand but the exact part numbers matching the wire gauge being used in the field.
Your BOM must include:
- Manufacturer and Series: Be specific (e.g., "Stäubli MC4-Evo2").
- Part Numbers for Each Gender: List individual SKUs for male and female connectors to prevent ambiguity.
- Wire Gauge Compatibility: State the required rating for the project's PV wire (e.g., 10 AWG or 8 AWG).
- Required Certifications: Mandate UL 6703 listing to ensure code compliance and site safety.
This decision tree gives technicians a clear path to follow when a system's performance suddenly drops, helping them quickly figure out if the problem is electrical or a physical seal that's been compromised.

As the graphic shows, a logical, step-by-step diagnostic process is the key to efficiently fixing field issues related to your solar wiring connectors.
Leveraging a Distributor for Success
Partnering with a distributor that maintains deep, ready-to-ship inventory provides a massive strategic advantage. It enables just-in-time delivery, reducing on-site storage needs and minimizing material theft or damage. It's also vital to make sure the connectors you order will work with the wire you've selected; you can learn more about picking the right solar PV wire options in our comprehensive guide.
At PES Supply, we solve these logistical challenges daily. Our massive in-stock inventory of authentic, UL-listed components from brands like Stäubli, optimized freight, and project-specific kitting capabilities take the guesswork out of procurement. We guarantee you have the right, compliant materials exactly when you need them.
By treating connector procurement as a critical project milestone, you slash risk, control costs, and set your installation crews up for success.
Solar Connector FAQs
Quick answers to the most common questions from installers, EPCs, and project managers in the field.
Can You Reuse Solar Connectors?
No. Solar wiring connectors are strictly single-use components.
The internal metal contact pin is engineered to create a permanent cold weld during the initial crimp. Attempting to reuse it results in a loose, high-resistance connection—a guaranteed failure point and fire hazard. Furthermore, the internal rubber seals are designed to compress once to create a weatherproof barrier; reusing them compromises this seal and invites moisture intrusion.
What Happens If Water Gets Inside a Connector?
Water intrusion is catastrophic for a solar connection. Moisture causes the metal contacts to corrode, which creates high electrical resistance. This leads to two critical problems:
- Power Loss: Resistance creates a significant voltage drop that kills the string's power output.
- Heat Generation: Current forcing its way through the corroded connection generates extreme heat, which can melt the housing, cause an electrical arc, and ignite a fire.
How Do You Disconnect Solar Connectors Safely?
Solar connectors have locking tabs to prevent accidental disconnection. A dedicated plastic disconnect tool is required to open them.
CRITICAL SAFETY WARNING: Never attempt to disconnect a solar connector while it is under load. Doing so will create a dangerous DC arc flash capable of causing severe burns and equipment damage. Always follow proper lockout/tagout (LOTO) procedures to completely de-energize the circuit before touching any connection.
At PES Supply, we stock the authentic, UL-listed solar wiring connectors and professional-grade tooling you need to build connections that are safe, compliant, and made to last. Don't risk your project's safety and profitability on subpar components.
Request a Bulk Quote for your next project here.
Related Resources:
- Best Solar Panels 2026 — Buyer's Guide
- EG4 vs Tesla Powerwall
- Qcells vs Trina vs JA
- Solar Inverter Buyer's Guide
- Solar Battery Buyer's Guide
- 5kW Solar Kit
- 10kW Solar + Battery Kit
- Off-Grid Cabin Kit
- EG4 Batteries
- Qcells Solar Panels
- Trina Solar
- JA Solar
- REC Solar
- Mission Solar
- Sol-Ark Inverters
- SolarEdge Inverters
- Generac PWRcell
Calculate how much storage you need with our battery sizing calculator.
Use our free solar system calculator to size your array.
Check out our Solar Panel Comparison Tool. Check out our Inverter Sizing Calculator.
Calculate your solar payback and 25-year savings with our Solar ROI Calculator. Follow our complete DIY solar installation guide for step-by-step instructions. Keep your system running at peak performance with our Solar Maintenance Guide.
Related Resources
- Solar System Calculator
- Battery Sizing Calculator
- Solar Panel Comparison Tool
- Inverter Sizing Calculator
- Solar ROI Calculator
- Solar Installation Guide
- Solar Maintenance Guide
- Solar Permitting Guide
- Battery Installation Guide
- NEC Code Compliance Guide
- Solar Panel Mounting Guide
- Grounding & Bonding Guide
- Solar Incentives by State
- Pro Account — Wholesale Pricing
- PowerLink Network — Contractor Program