Updated September 2026 — refreshed against the live PES catalog; product pricing verified 2026-09-26.
2026 product line update
| Product | Class | Price |
|---|---|---|
| Canadian Solar 710W TOPCon Bifacial Solar Panel | 710W | $340.80 |
| Hyundai 640W 156-Cell TOPCon Bifacial Solar Panel | 640W | $220.78 |
| Thornova Solar TS-BGT72(600) 600W Bifacial Solar Panel | 600W | $165.76 |
| Thornova Solar 595W Solar Panel 144 Cell Bifacial TS-BGT72(595) Wholesale 31 panels per pallet | 595W | $164.64 |
| ZNShine Solar 585W 144-Cell Bifacial Solar Panel | 585W | $246.99 |
| Hyundai HiS-S585OJ 585W Clear on Transparent156 Half-Cell Bifacial Solar Panel | 585W | $195.86 |
Live prices verified 2026-09-26. The current pallet line tops out at 550–640W, plus the Canadian Solar 710W TOPCon flagship panel.
Solar panels work by absorbing sunlight in silicon cells and pushing the freed electrons out as direct current — DC — which an inverter then converts into the alternating current your home uses. Every rooftop system you have ever seen is that trick repeated across a few dozen panels, plus the racking, wiring, and safety hardware that makes it legal and durable. This guide explains each piece in plain terms with real numbers: how cells become panels, how panels become arrays, how series and parallel wiring actually change the electricity, and what the installation on your roof physically consists of. I ship this hardware every day, and I've learned that buyers who understand the stack buy better systems — so here is the stack.

From Cell to Panel to Array
The hierarchy confuses people because the words get used interchangeably. They are not interchangeable:
| Level | What It Is | Typical 2026 Numbers |
|---|---|---|
| Cell | One silicon wafer, ~182mm square in modern modules | ~5.5–6W each, ~0.6V |
| Panel (module) | 120–144 half-cut cells laminated under glass | 400–460W, ~35–50V |
| String | Panels wired in series | 8–12 panels, 300–600V |
| Array | All strings combined on a roof | 5–15kW residential |
| System | Array + inverter + racking + wiring + monitoring | The whole purchase |
So a "10kW system" is about 22–24 panels, in 2–3 strings, on roughly 450 square feet of roof. When a quote says "22-panel system," multiply by the module wattage yourself — 22 × 430W = 9,460W, not 10kW, and the difference is yours to catch.
Series vs Parallel: The Two Ways Panels Connect
This is the most practically useful concept in the whole article, because it determines voltage, current, wire size, and shade behavior:
| Wiring | Voltage Behavior | Current Behavior | Shade Behavior |
|---|---|---|---|
| Series | Adds: 10 × 42V = 420V | Stays at one panel's ~10–11A | One shaded panel throttles the string (bypass diodes limit damage) |
| Parallel | Stays at one panel's ~42V | Adds: 3 × 10.5A = 31.5A | Shade hurts only the shaded branch |
Worked example with real numbers: eight 430W panels at 42V/10.2A each. All in series: 336V at 10.2A = 3,427W. In two parallel strings of four: 168V at 20.4A = same 3,427W — watts are conserved, only the V/A split changes. Series is preferred because higher voltage means thinner, cheaper wire for the same power (I²R losses drop with lower current), which is why residential systems run 300–600V strings. The constraint is the inverter's input window and NEC 690.7's cold-weather voltage ceiling, both covered in the series-vs-parallel wiring guide and our wiring basics article.
Panel Types Worth Knowing in 2026
| Type | Efficiency | Look | Best For |
|---|---|---|---|
| Monocrystalline PERC | 20.5–21.5% | Black cells, silver or black frame | Value residential |
| N-type TOPCon | 21.8–22.8% | Usually all-black options | Mainstream best-buy 2026 |
| Half-cut cell | +5–10W vs full-cell twin | Two stacked half-grids | Shade resilience — halves act independently |
| Bifacial | +5–15% rear-side gain | Glass-glass, semi-transparent | Ground mounts, carports, light roofs |
| Thin-film | 18–19% | Uniform dark sheet | Utility scale; specialty residential |
Half-cut deserves the extra sentence: splitting each cell in half halves the current per path, which cuts resistive loss and — more usefully on real roofs — means a chimney shadow across the bottom of a panel kills only the bottom half. Bifacial is real but conditional: the rear gain needs reflected light, so it sings over white membranes and gravel and does nothing flat against dark shingles. Match the type to the roof, not the brochure.
What a Rooftop Installation Physically Consists Of
Strip the mystery and a residential install is five assemblies. Attachments: flashed lag-bolt mounts into rafters (not just sheathing — a real installer finds rafters), spaced per the racking engineer's span table. Rails: aluminum extrusion spanning the attachments, squared to the roof. Panels: clamped to rails, mid-clamps between, end-clamps at edges, wired row by row with factory MC4 leads. Home run: strings transition from PV wire to conduit (EMT or PVC per local code) down to the inverter or junction point — wire selection is covered in the PV wire vs USE-2 vs THHN guide, and yes, the distinction matters. Electrical landing: rapid-shutdown initiator, inverter, AC disconnect where required, backfed breaker in the panel. Racking hardware lives in roof mount kits and solar mounting systems; the full sequence is in the mounting guide.
How the Electricity Actually Reaches Your Outlets
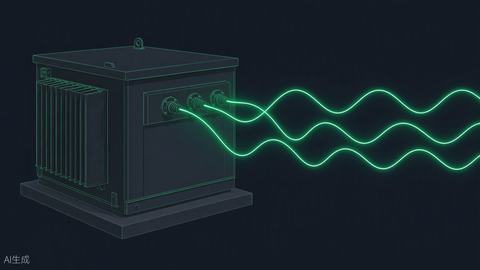
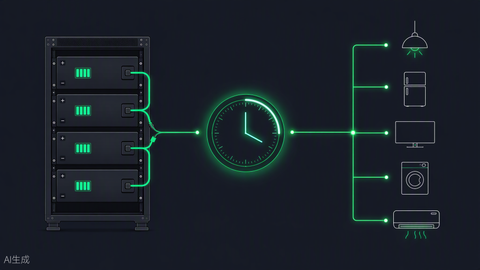
Panels make DC at string voltage; the inverter's job is threefold: convert DC to 120/240V split-phase AC, synchronize it precisely to the grid's 60Hz waveform, and continuously hunt the panels' maximum power point (MPPT) as light and temperature move. Good inverters do this at 96–98.5% efficiency and update their MPPT tracking many times per second. The AC then flows to a breaker in your main panel, and from that busbar it is indistinguishable from utility power — your refrigerator cannot tell, and neither can your meter except in the direction of flow. Component-level detail continues in solar panel system components.
What Controls How Much Power You Get
Five dials, in order of how much they matter on a real roof:
| Factor | Rule of Thumb | What To Do About It |
|---|---|---|
| Sun hours (location) | 3.0–5.8 effective PSH across the US | Nothing — but size the array to your number |
| Orientation & tilt | South = 100%, east/west ≈ 85–88%, north = avoid | Use best planes first; west can win on TOU rates |
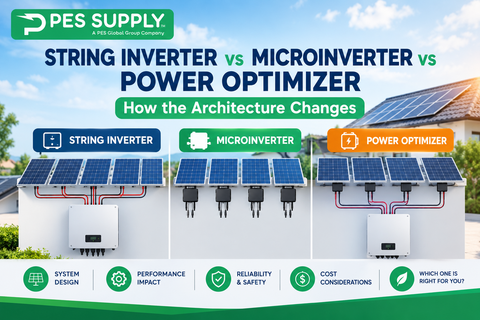
| Shade | 10–30%+ loss if unaddressed | Micros/optimizers, layout, tree trimming |
| Heat | ~0.3% loss per °C above 25°C cell temp | Airflow gap; better-coefficient panels in hot zones |
| Soiling | 2–5%/yr uncleaned | Rain usually suffices; clean in dusty regions |
Multiply the first two and you have your effective peak sun hours; the rest are the derate stack covered across this site's calculators, including the watts-to-kWh calculator for quick conversions. The single most common field surprise I encounter is homeowners blaming the panels for what a growing maple tree did — check shade first, hardware second.
Installation Day: What Actually Happens
A competent crew of three to five installs a typical 8–12kW residential system in two to four working days. Day one is attachments and rails; day two is panels and string wiring; the electrical landing and inverter hang usually close it out. Then the quiet weeks begin: inspection scheduling and the utility's permission-to-operate letter, which is the legal switch that turns the array on. The homeowner's job during all of it is small but real — clear driveway access, an unlocked electrical room, and decisions about conduit routing made promptly. The full project sequence, from site survey through PTO, is mapped in the solar installation guide.
Maintenance: Nearly Nothing, Done Regularly
The complete maintenance program for a rooftop array: glance at the monitoring app monthly, rinse the panels if you live somewhere dusty and rainless, keep trees trimmed back to their install-day shadow lines, and have a pro torque-check and inspect every five years or after any roof work nearby. No oil, no filters, no moving parts. The component with a service life is the inverter — string units typically need replacement or service once in 12–18 years — so budget a few hundred dollars of reserve annually and the system never surprises you financially. The maintenance guide has the seasonal checklist version.
Small Systems and 12V Questions
Everything above scales down gracefully to RVs, boats, and sheds. A single 200W panel through a charge controller makes roughly 800–1,000Wh on a good day — enough for lights, fans, and device charging, not air conditioning — and the series/parallel math from earlier applies unchanged at 12V. If that is your scale, start with can a 200-watt panel run a 12-volt setup and size wire with the PV wire section rather than lamp cord, which we still find in the wild more often than I wish.
Frequently Asked Questions

How do solar panels work in simple terms?
Sunlight frees electrons in silicon cells, creating DC electricity. Panels wired together feed an inverter, which converts DC to household AC that powers your home, with surplus earning grid credit.
What are solar panels made of?
Tempered glass over silicon cells sealed in encapsulant, a backsheet or second glass layer, an aluminum frame, and a junction box with bypass diodes and factory MC4 connectors.
Is series or parallel wiring better for solar panels?
Series for most homes: it raises voltage and keeps current low, allowing thinner wire and efficient inverters. Parallel helps specific shade or low-voltage (12/24V) cases. Many systems use both across strings.
How many volts does one solar panel produce?
Modern residential modules run about 35–50V open circuit. Cells inside are only ~0.6V each — the panel's 120+ cells wired in series internally are what build useful voltage.
Do solar panels need direct sunlight?
No — they produce 10–25% of rated power under overcast skies from diffuse light. Direct sun is required for full output, not for any output.
How efficient are home solar panels?
20.5–22.8% for mainstream mono panels in 2026. Efficiency buys roof-space savings; a lower-efficiency panel of the same wattage makes the same power from a slightly larger footprint.
How a Panel Gets Made (And Why It Matters to Buyers)
A module factory is a lamination line: cells are cut, soldered into strings with ribbon busbars, laid on glass over encapsulant film, covered with a backsheet or second glass sheet, then laminated under heat and vacuum into one sealed sandwich, framed, and flash-tested. Every panel gets an individual flash-test label with its actual measured Pmax, Voc, and Isc — which is why a "430W" bin contains panels measuring 430–435W. The buyer-relevant lessons: lamination quality is the durability variable (cheap lines delaminate in year 8–12), flash-test binning is real (tier-one lines bin tightly), and the factory's financial health is a warranty feature, because a 25-year warranty from a bankrupt brand is a bookmark. We vet manufacturers on all three before they reach the panels collection — the spec sheet is the audition, not the decision.
Reading the Nameplate on the Back of a Panel
| Field | Example Value | What It Tells You |
|---|---|---|
| Pmax | 430W | Rated output at standard test conditions (1,000W/m², 25°C cell) |
| Voc | 49.5V | Open-circuit voltage — the string-sizing, cold-weather number |
| Isc | 10.9A | Short-circuit current — the wire and fuse sizing number |
| Vmp / Imp | 41.2V / 10.44A | Where the panel actually works at maximum power |
| Max system voltage | 1,000V or 1,500V | Series ceiling for the string |
| Temp coefficient of Pmax | −0.30%/°C | Hot-day output loss rate |
| UL 61730 listing | Present or absent | Safety listing — absent means do not buy, full stop |
That last row is non-negotiable, and I have refused to sell gray-market modules over it: no listing means no permit, no insurance, and no recourse. Everything else on the nameplate is an engineering input; the UL mark is the license to play.
Failures We Actually See in the Field
| Failure | Frequency | Cause | Prevention |
|---|---|---|---|
| MC4 cross-mating / field crimps | Common in DIY | Mixed connector brands, hand-crimped pins | Factory leads only, matched brands |
| Bypass diode failure | Occasional | Heat + shading stress | Quality modules; shade management |
| Potential-induced degradation (PID) | Rare on modern N-type | High voltage + humidity leakage | PID-resistant cell chemistry |
| Micro-cracks | Occasional | Freight drops, walking on panels | Never step on modules; inspect on delivery |
| Delamination | Rare on tier-one | Cheap encapsulant | Brand vetting |
| Connector water ingress | Occasional | Connectors left hanging in gutters/drip lines | Clip leads to rails per racking manual |
The pattern to notice: nearly every row is an installation or sourcing variable, not a technology flaw. The silicon itself is the most reliable part of the system — it is the humans with crimpers and the freight drivers with tailgates who write the warranty claims.
Roof Mount vs Ground Mount
Roof mounting is cheaper ($0 because the structure exists) and faster, but locks you to the roof's orientation and condition. Ground mounting adds $4,000–$8,000 for steel, concrete, and trenching on a residential scale, and buys perfect tilt, perfect azimuth, easy cleaning, zero roof-penetration risk, and painless panel service. In snow country, ground mounts tilt steep and shed; in wildfire country, they keep the array off the structure entirely. If the roof is marginal in any dimension — age, shade, orientation, structure — price the ground option before compromising the array to fit a bad surface. A good ground mount beats a compromised roof install every single time I have run both numbers.
Sizing Strings to Inverters: A Second Worked Example
Because this is the calculation DIY builders get wrong most, one more pass with different numbers. A 460W module with 41.8Vmp / 49.9Voc and 11.6A Isc feeds an inverter with a 125–500V MPPT window and 14A input limit per tracker. String of 10: 499V open-circuit at standard conditions — but correct for a −5°C design morning at −0.26%/°C: factor = 1 + 30 × 0.0026 = 1.078, so 49.9 × 1.078 = 53.8V per module, 538V per string. That exceeds the 500V tracker ceiling: the string is illegal for that inverter, full stop. Drop to 9 modules (484V corrected, 376V at Vmp) and the design passes with margin. Current never approached the 14A limit — voltage, not current, is the binding constraint on residential strings, which is why the cold-weather correction in NEC 690.7 exists and why skipping it is not a shortcut but a defect. When in doubt, shorter strings and more parallel inputs are the forgiving direction; long strings are the brittle one.
Why Voltage, Current, and Watts Keep Getting Confused
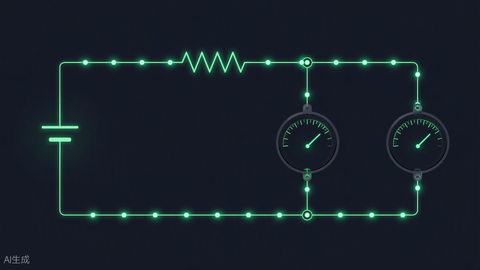
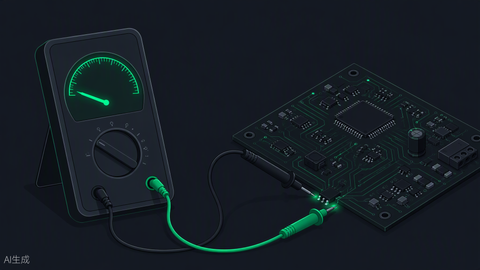
One vocabulary pass, because half the mistakes we troubleshoot are vocabulary mistakes. Voltage is electrical pressure — it determines whether the inverter can operate and whether insulation is stressed, and it is nearly load-independent, which is why a "dead" string can still measure full voltage in sunlight. Current is flow — it heats wire (losses scale with the square of current, which is why high-voltage strings are efficient) and it is what fuses and ampacity tables govern. Watts are the product of the two — the thing you are billed on and the only number that pays. A panel can show perfect Voc and zero current (an open circuit somewhere), or full current at collapsed voltage (a shorted bypass diode), and only a meter on both quantities separates the two. Learn to read the pair together and half of solar troubleshooting stops being mysterious.
Bottom Line
Understanding solar power is understanding a short chain of physical objects: cells laminated into panels, panels strung into arrays, arrays feeding an inverter, the inverter landing on your panel's busbar. Each link has two or three numbers that govern it, and all of them are printed on nameplates and datasheets rather than hidden. Learn the chain, check the arithmetic on any quote you receive, and buy hardware with real listings and real warranties. The sun handles the rest with a reliability record no utility can match — it has shown up every morning so far, and the panels on your roof are simply a way of being paid for noticing. When you are ready to move from understanding to owning, our team sizes systems off your actual utility bill rather than generic rules of thumb, stocks the tier-one modules described above at wholesale pricing, and will happily talk you out of hardware that does not fit your roof — the shortest path to a system you will still be pleased with in year twenty. Bring us the twelve-month kWh total and a photo of the roof, and the rest is arithmetic we do together, out loud, with the work shown. That is the entire method of this article applied to your house instead of a hypothetical one.
What a Panel Costs and Why
Module pricing in 2026 runs $0.20–$0.35 per watt at wholesale depending on tier and volume — a 430W panel is an $86–$150 object. The price ladder tracks efficiency class, warranty depth, and brand bankability, in that order, and freight is the silent fourth factor: a pallet of 31–36 panels ships LTL for $400–$900 depending on distance, which is why per-panel prices improve with full-pallet orders and why we encourage buyers to round projects up to pallet quantities when the roof allows. Below roughly $0.18/W you are no longer buying a cheaper tier-one panel; you are buying a different category of object, with the B-grade cells and shorter warranties that price implies. The spread between a $0.22/W value module and a $0.32/W premium one is $430 on a ten-panel string — worth paying for constrained roofs and hot climates, worth skipping on big open ones.
End of Life: Where Panels Go
A panel is 75–80% glass and aluminum by weight — the two most recycled materials in the industrial economy — plus copper ribbon and a silicon wafer thinner than a hair. Recycling infrastructure lagged the install boom for years and is now catching up as first-generation volumes retire; several states mandate panel recycling and most tier-one manufacturers run take-back programs. The practical guidance for owners: a functional used panel has resale value in the off-grid and DIY markets, a broken one goes to an e-waste or solar-specific recycler, and neither belongs in a landfill in the states that have said so by law. The 30-year asset you install in 2026 enters a recycling stream that will be unrecognizably more mature by the time it needs one.
DIY vs Professional Install: The Honest Split
The roof work is learnable — attachments, rails, clamps, and string wiring are within a careful homeowner's reach, and our kit customers prove it weekly. The genuinely professional parts are the design calculations (string sizing, structural spans, the 120% rule), the permit package, and the warranty chain of custody. A hybrid approach we endorse: DIY the array, hire a licensed electrician for the panel landing and the permit signature. That split captures most of the labor savings while keeping the paper trail clean for inspectors, insurers, and future home buyers, all three of whom will ask who did the electrical work. Whatever route you take, the equipment side stays simple: matched kits, factory connectors, listed components, and the arithmetic in this article checked twice.
Need pricing or availability on anything in this guide?
Portlandia Electric Supply dropships direct from the manufacturer — most items Ship Direct with lead times stated up front, no surprises.
Get a quote from PESBulk, pallet and contractor pricing available.